
What is a Print Bleed? How to Add Bleeds in Adobe Products?
When designing a print project, you will often want the images or other graphics to extend all the way to the very edges of the printed material. This is known as a print bleed, and it is a particularly important part of the printing process. If you want to know “what is a print bleed,” the answer is the area of the printed material, with a background image, that will be trimmed off after the material is printed and cut.
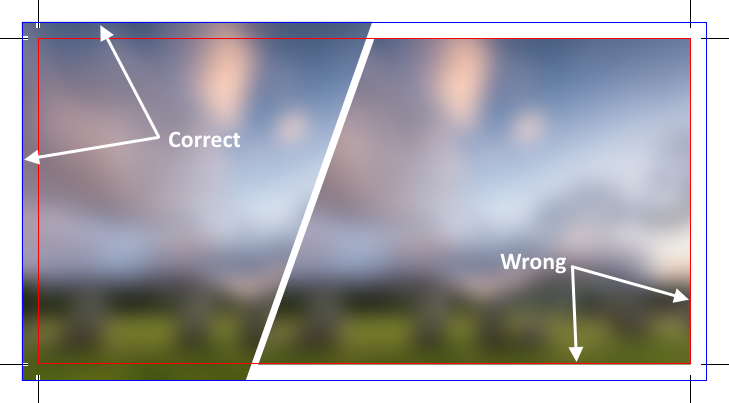
The best way to achieve a proper print bleed is to print larger than what you actually need and then trim the edges off. In other words, extend the image beyond the size you want into the bleed zone. Then, when it is cut, the extra portion of the image will be cut off and you will have a clean, seamless print that goes to the edge of the document.
In general, a standard print bleed area is .125 inches on each side. If you need to prepare a standard 11 x 8.5-inch document for printing, the final template will need to be 11.25 x 8.75 inches. On the other hand, if you are printing a custom background image on a 9 x 12-inch folder (a standard size), the image needs to extend to about 9.25 x 12.25 inches.
Most common size documents only need a .125-inch margin on each side, but larger documents might need a larger bleed area. The standard bleed area for documents larger than 24 x 36 inches is generally .5 inches. In other words, when preparing an 18 x 24-inch document for printing, you need to prepare an 19 x 25-inch template.
Since there is no way to know exactly where the bleed area will be cut, extend the images beyond the edge of the final document, and go all the way to the end of the bleed zone. While it is okay to extend a background design into the bleed zone, you do not want a photo of someone in the bleed area because they will get cut from the final design.
How to Add Bleed in Adobe Photoshop
Start the process by adding some guides around the designated image:
- Ctrl+R enables the rulers
- Next, go to View > Snap To > Document Bounds so you can make sure the new guides snap to the edges of the document
- Then, click the top ruler and drag a guide down to the top edge of the document
- Go to the left ruler and drag down a second guide to the left edge of the document
Following the same techniques, add an additional two guides to the other two edges of the document. Having these guides remain active helps to separate the printed area from the area that is set to be trimmed.
Here is how to add a bleed in Photoshop:
- Go to Image > Canvas Size so you can set the units to millimeters
- Add .125″ of bleed by increasing the existing Width and Height values by .25″
- Click “OK” and the document will expand by 3mm on each edge
How to Add Bleed in Adobe Illustrator
To create an image that includes bleed in Adobe Illustrator:
- Open Illustrator and then click File > New
- Input the size of the document
- In order to add a bleed, go to the bleed options and enter 0.125 for the top
- The other fields should auto-populate but, if this does not happen, enter 0.125 in the bottom, left and right
- Set the Color Mode to CMYK
- Set the Raster Effects at High 300 ppi
Here is how to add bleed in Illustrator:
- Open your document
- Click file > document setup
- In the first box next to “Bleed,” hit the arrow under “Top” (once) until it reads “0.125 in”
- The other boxes will then auto-populate
- Click “OK”
How to Add Bleed in Adobe InDesign
In order to create bleed in InDesign images:
- Open InDesign and then click File > New > Document
- Enter the desired TRIM dimensions under Page Size (as an example, standard business cards have trim dimensions of 3.5″ x 2″)
- If “Bleed and Slug” is not visible at the bottom of the window, click the button that says “More Options”
- Enter 0.125 for the top, bottom, left and right bleed
Here is how to add bleed to InDesign:
- Open the document
- Then, click: File > Document Setup
- Next, click on “Bleed and Slug”
- Type in 0.125 in the first box next to “Bleed”
- Hit “tab” on the keyboard and the other boxes will auto-populate
- Click “OK”
The addition of bleed to your next print design will enhance the look of the overall final printed product. If you have any questions about the process, reach out to our team for more information about adding a bleed to your next print project.
Contact Us for More Information
Are you looking for a printer who can help you meet your deadlines?
Then your in the right place! Have any questions or concerns we would love to hear from you.
Please submit your information in this form and a sales professional will reach out to you.
Want to Speak to a Sales Representative? Call 770-424-2300